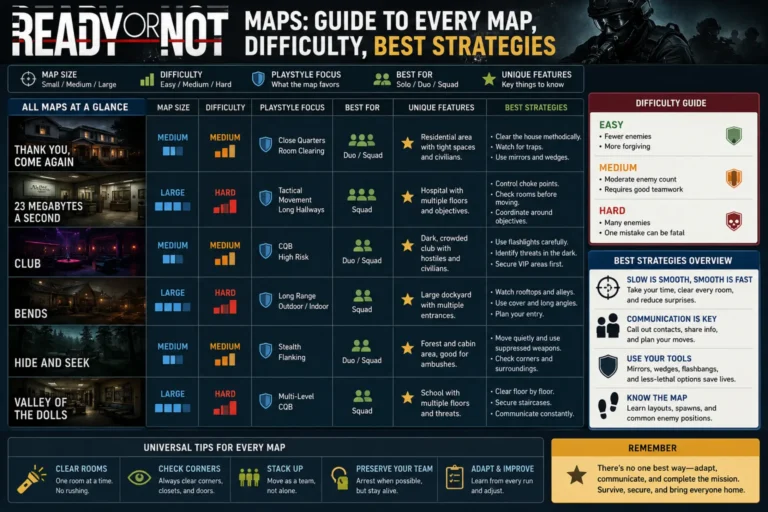
Ready or Not maps are one of the most important parts of the tactical shooter Ready or Not. Each map offers different layouts, enemy positions, and mission objectives. Some maps are small and easy to learn. Others are large and highly challenging.
Players must study each map carefully. Good map knowledge improves survival, teamwork, and mission success. It also helps you choose the right weapons and equipment before deployment.
In this guide, you will learn the full list of maps, difficulty levels, and the best strategies for each one. The explanations use simple English and practical examples. Whether you are a beginner or an experienced player, this guide will help you navigate every Ready or Not map more effectively.
Quick Summary
- Ready or Not maps are tactical mission locations in the game.
- Each map has unique objectives and enemy placements.
- Some maps focus on close-quarters combat.
- Others require long-range observation and coordination.
- 4U Gas Station and 213 Park Homes are beginner-friendly maps.
- Port Hokan and Hospital are among the hardest maps.
- Map knowledge improves mission success and team survival.
- Learning entry points and choke points is essential.
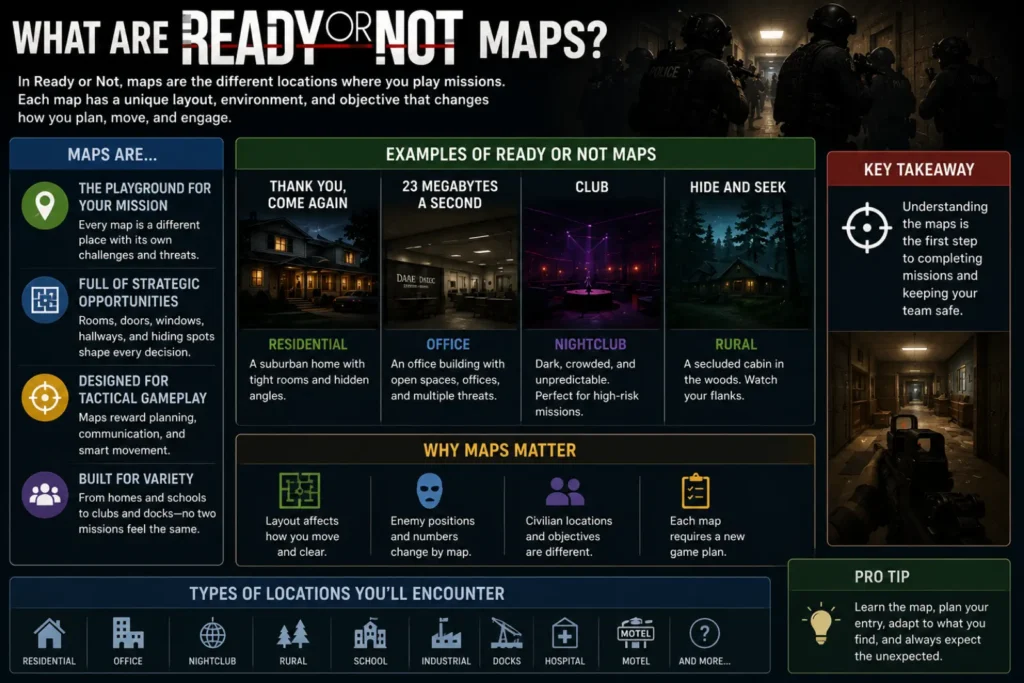
What Are Ready or Not Maps?
Ready or Not maps are the locations where missions take place.
Every map includes:
- Objectives
- Suspects
- Civilians
- Entry points
- Environmental hazards
Some missions require arrests. Others focus on hostage rescue or evidence collection.
The map layout changes how you approach each mission.
Complete List of Ready or Not Maps
The current map pool includes many distinct locations.
| Map | Difficulty |
|---|---|
| 4U Gas Station | Easy |
| 213 Park Homes | Easy |
| Twisted Nerve | Medium |
| Car Dealership | Medium |
| Valley of the Dolls | Hard |
| Port Hokan | Hard |
| Hospital | Hard |
| Brisa Cove | Hard |
New updates may add additional maps over time.
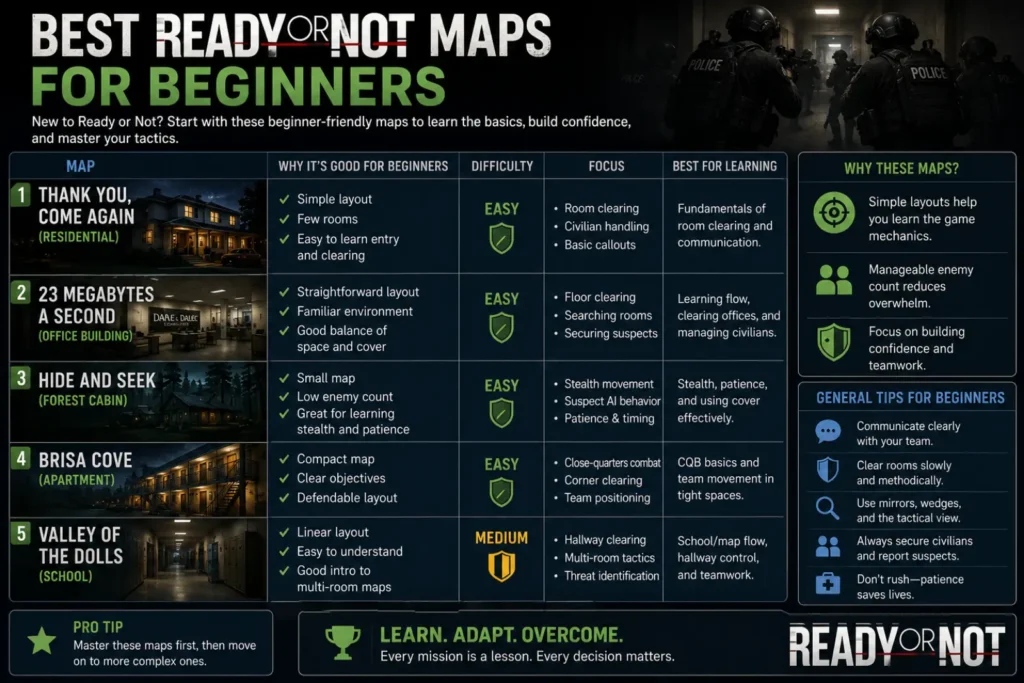
Best Ready or Not Maps for Beginners
New players should start with smaller maps.
Recommended Beginner Maps
4U Gas Station
Best Starter
- Small layout
- Few rooms
- Easy navigation
- Fast mission completion
213 Park Homes
Beginner Friendly
- Simple apartment structure
- Limited sightlines
- Good for learning room clearing
These maps help players practice communication and movement.
Hardest Ready or Not Maps
Some maps challenge even experienced squads.
Most Difficult Maps
Advanced
Port Hokan
Very Hard
- Large industrial area
- Many entry points
- Long sightlines
- Complex suspect locations
Hospital
Very Hard
- Multiple floors
- Dense room count
- High civilian presence
- Frequent ambush opportunities
Brisa Cove
Very Hard
- Tight hallways
- Dangerous corners
- Highly aggressive suspects
These maps require strong teamwork and careful planning.
Ready or Not Map Difficulty Comparison
| Map | Difficulty | Best For |
|---|---|---|
| 4U Gas Station | Easy | Beginners |
| 213 Park Homes | Easy | Training |
| Twisted Nerve | Medium | Intermediate |
| Car Dealership | Medium | Team practice |
| Valley of the Dolls | Hard | Advanced |
| Port Hokan | Hard | Expert squads |
| Hospital | Hard | Expert squads |
| Brisa Cove | Hard | Expert squads |
How to Learn Ready or Not Maps Quickly
Map knowledge develops through repetition.
Fast Learning Method
4-Step Learning Method
Fast Progress
- Walk through the map slowly.
- Memorize major rooms.
- Identify common choke points.
- Practice different entry routes.
After several runs, you will recognize dangerous areas automatically.
Best Strategies for Large Maps
Large maps punish careless movement.
Useful Strategies
- Move as a team.
- Clear one section at a time.
- Use wedges on unchecked doors.
- Maintain crossfire coverage.
- Communicate every suspect sighting.
- Avoid rushing long hallways.
These strategies work especially well on Port Hokan and Hospital.
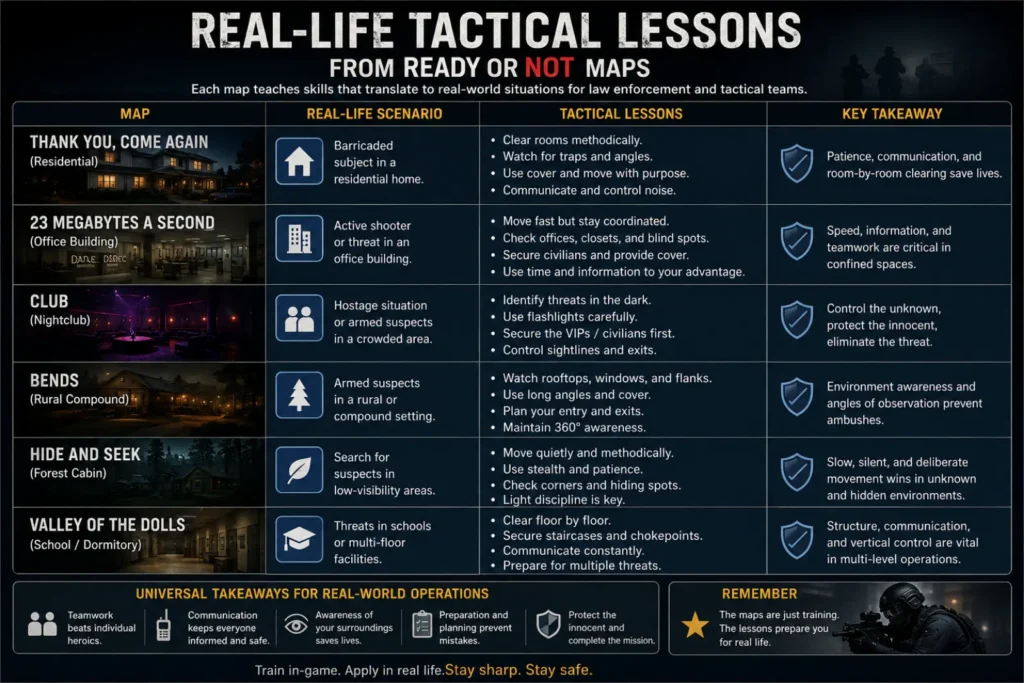
Real-Life Tactical Lessons from Ready or Not Maps
The game rewards planning and communication.
For example:
- A gas station teaches quick room checks.
- An apartment map teaches stairwell control.
- A hospital map teaches multi-floor coordination.
- A warehouse map teaches long-range observation.
Many players improve teamwork skills by studying these scenarios.
Common Map Mistakes
Players often fail missions because of simple errors.
Mistakes to Avoid
- Entering rooms alone
- Ignoring side doors
- Forgetting civilian locations
- Rushing objectives
- Not checking upper floors
- Using the wrong equipment
A careful approach usually produces better results than a fast approach.
Best Weapons for Different Ready or Not Maps
Choosing the right weapon can improve your mission success. maps need different equipment than large maps.
Maps small
Small maps have tight hallways and short engagement distances.
Recommended weapons:
- MP5
- MP7
- Short-barreled rifles
- Shotguns (for close quarters)
These weapons offer better handling in confined spaces.
Large Maps
Large maps include open areas and long sightlines.
Recommended weapons:
- MCX
- SR-16
- MK18
- Scoped assault rifles
These firearms provide better accuracy over longer distances.
Best Equipment for Every Mission
Weapons alone do not guarantee success.
Bring equipment that matches the mission.
| Equipment | Best Use |
|---|---|
| Flashbang | Clear dangerous rooms |
| CS Gas | Control suspects |
| Door Wedge | Block unused entrances |
| Mirror Gun | Check rooms safely |
| Ballistic Shield | Lead room entries |
| Breaching Shotgun | Open locked doors |
A balanced loadout helps the entire team.
Advanced Tips for Every Ready or Not Map
Experienced players follow simple habits that increase survival.
1. Clear One Room at a Time
Never rush multiple rooms.
Finish one area before moving forward.
2. Watch Every Door
Suspects may appear from unexpected directions.
Always secure nearby doors.
3. Communicate Constantly
Call out:
- Suspects
- Civilians
- Open doors
- Traps
- Cleared rooms
Good communication prevents friendly fire.
4. Stay Together
A separated squad becomes an easy target.
Move as a unit whenever possible.
Ready or Not Maps Compared
Each map offers a different experience.
| Feature | Small Maps | Large Maps |
| Mission Length | Short | Long |
| Navigation | Easy | Complex |
| Enemy Locations | Predictable | More varied |
| Team Coordination | Moderate | Essential |
| Recommended Skill | Beginner | Advanced |
Choose maps based on your experience level.
Common Mistakes Players Make
Even skilled players repeat the same errors.
Avoid these mistakes:
- Sprinting into unknown rooms
- Ignoring windows
- Forgetting to restrain civilians
- Leaving doors unsecured
- Splitting the team
- Skipping evidence collection
- Using flashbangs carelessly
Correcting these habits improves mission ratings.
Tips to Master Every Ready or Not Map
Learning every map takes time.
These tips make the process easier.
- Learn one map before moving to another.
- Practice different entry routes.
- Memorize staircases and choke points.
- Watch experienced players.
- Play with a consistent squad.
- Review failed missions to find mistakes.
Steady practice builds confidence.
Related Terms and LSI Keywords
Using related terms helps cover the topic naturally.
Primary Keyword
- ready or not maps
Related Search Terms
- Ready or Not mission list
- Ready or Not map guide
- Ready or Not level guide
- Ready or Not locations
- Ready or Not tactical maps
- hardest Ready or Not map
- easiest Ready or Not map
- Ready or Not mission order
- Ready or Not strategy guide
- Ready or Not walkthrough
These keywords improve topical relevance without keyword stuffing.
Expert Insight
Map knowledge separates average players from excellent squads.
Experienced teams rarely rely on luck.
Instead, they study layouts, predict suspect movement, and assign clear roles before entering.
Players who understand map design react faster under pressure.
They also complete objectives with fewer casualties and higher mission scores.
Learning every map is one of the fastest ways to improve in Ready or Not.
Frequently Asked Questions
How many maps are in Ready or Not?
The game includes multiple tactical mission maps, and developers may add more through future updates.
Which Ready or Not map is best for beginners?
4U Gas Station and 213 Park Homes are excellent starting maps because they are smaller and easier to learn.
What is the hardest Ready or Not map?
Many players consider Port Hokan, Hospital, and Brisa Cove among the most difficult missions.
Do Ready or Not maps change?
Major game updates may introduce new maps, mission changes, or layout improvements.
Which map is best for practicing teamwork?
Large maps such as Hospital and Port Hokan require excellent communication and coordination.
Can I play every map solo?
Yes. However, some difficult maps become much easier with a coordinated team.
Why is map knowledge important?
Knowing the layout helps players move safely, clear rooms efficiently, and complete objectives faster.
Conclusion
Understanding Ready or Not maps is one of the best ways to become a better tactical player. Every map offers unique objectives, layouts, and challenges. Smaller maps help beginners build confidence, while larger maps test teamwork, communication, and planning. Choosing the right weapon, equipment, and strategy for each mission greatly improves your chances of success.
Spend time learning room layouts, entry points, and common suspect locations. Practice with your squad and review your mistakes after each mission. As your map knowledge grows, your performance will improve. Whether you play solo or with friends, mastering Ready or Not maps will make every mission smoother, safer, and more rewarding.